


How to Install Solar Street Light?
Step-by-step Solar Street Light Installation Guide
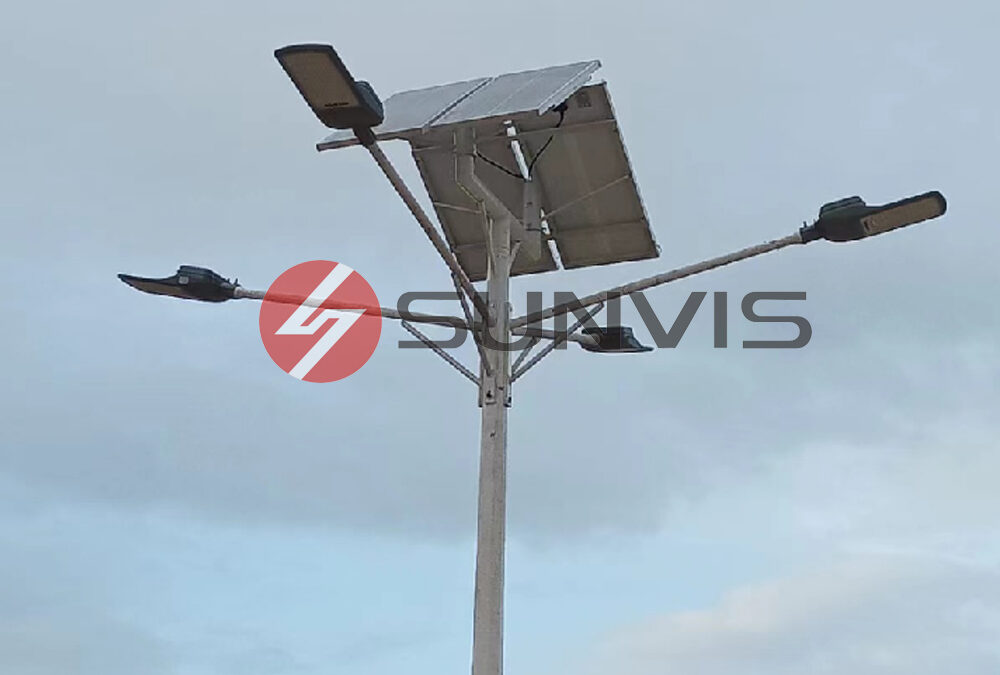
(For Split Solar Street Light only)
Introduction.
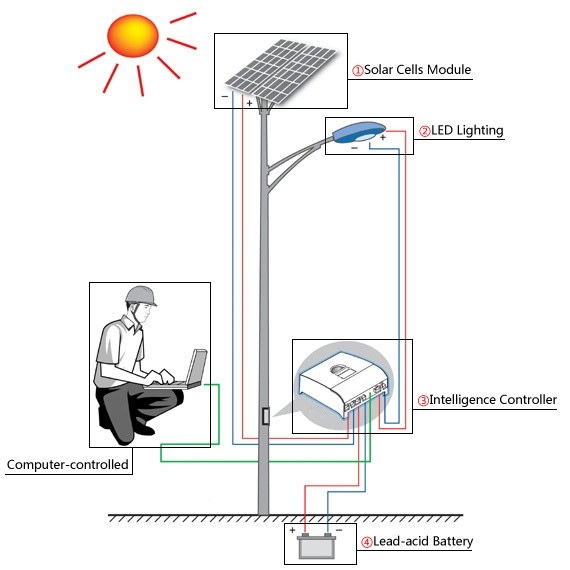
Solar street lights are a popular lighting option that provides cost-effective and energy-efficient lighting for public places. The installation of solar street lights involves several key steps, from preparing the site to installing solar panels, battery boxes, lamp posts, and LED lights.
In this blog, we will discuss the step-by-step process of installing a solar street lighting system, as well as some safety guidelines that should be followed during the installation process.
Step 1: Site Preparation
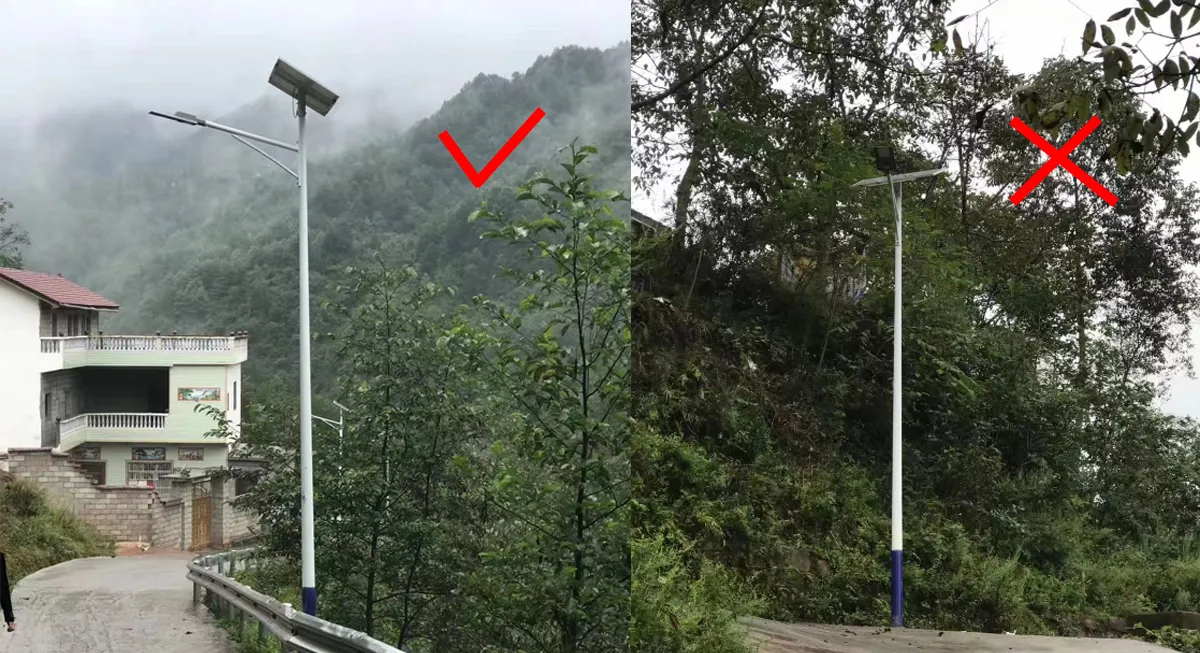
The first step in installing a solar street lighting system is to prepare the site. Check the area to ensure that the location is suitable for installing a solar street lighting system. The following conditions should be met:
It should receive sufficient sunlight and there should be no obstacles that may block the solar panel within a 5-meter radius of the site. For example, the installation site cannot be under a tree or near tall buildings, as these areas may have shadows that can affect the solar panel's charging.
Avoid underground cables and drainage pipes.
After clearing obstacles, confirm the soil condition. If the soil is too loose, dig down vertically by one meter to ensure the stability of the foundation soil.
The site should also be level to ensure the lamp post is upright and safe. Once the site is ready, you can proceed to the next step.
Step 2: Prepare the Lamp Post Foundation
According to the manufacturer's foundation drawing and installation manual, dig a hole of the required size (for the lamp post foundation and battery hole), pour cement concrete for the lamp post foundation, smooth it out, and leave a wiring tube that goes directly to the battery hole in the middle.
The wiring can be done in advance for the later cabling of the battery. The battery hole does not need to be cemented and can just be dug in the soil.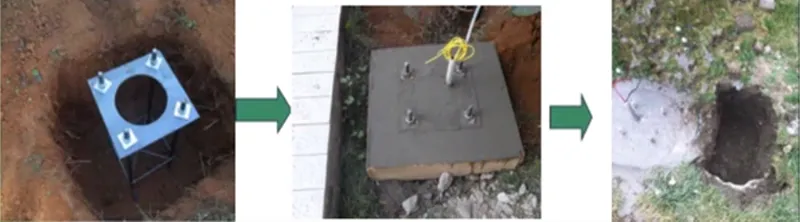
Step 3: Pre-Assembly of Components(Solar Panels and Batteries)
Assembly of solar panels and brackets: Align the installation holes of the solar panels and brackets and tighten the screws.
Pre-assembly of batteries: Place the batteries in the battery box, install the sealing ring, and thread the battery wires from the top cover wire outlet. Cover the top cover, align it with the holes, and tighten the screws.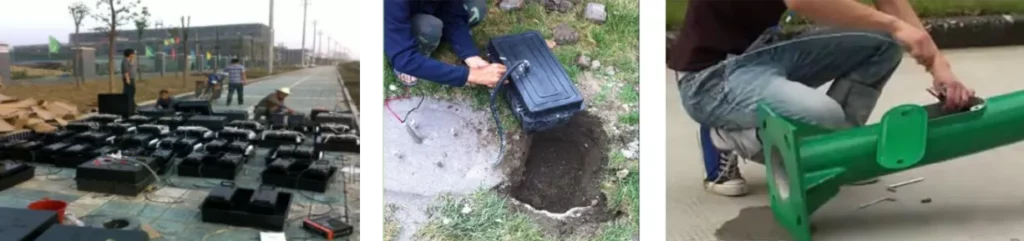
Step 4: Cabling (Battery, Lamp Head, Solar Panel Cabling)
Battery cabling: Place the pre-assembled battery in the battery hole, wrap it with a waterproof hose, fix it firmly, and thread it out from the pipe opening. To prevent short circuits, wrap the positive and negative poles with a layer of insulating tape.
Solar panel cabling: Thread the wire from the solar panel into the top of the lamp post, pull it out from the maintenance door, thread it into the lamp head wire from the arm outlet, and pull it out from the maintenance door. Pay attention to distinguishing the lamp head wire from the solar panel wire to prevent wiring errors when connecting to the controller.

Step 5: Wiring
Lamp head wiring: Pay attention to not reversing the positive and negative poles, wrap them with insulating tape after connecting.
Solar panel wiring: Pay attention to not reversing the positive and negative poles, and wrap them with insulating tape after connecting.
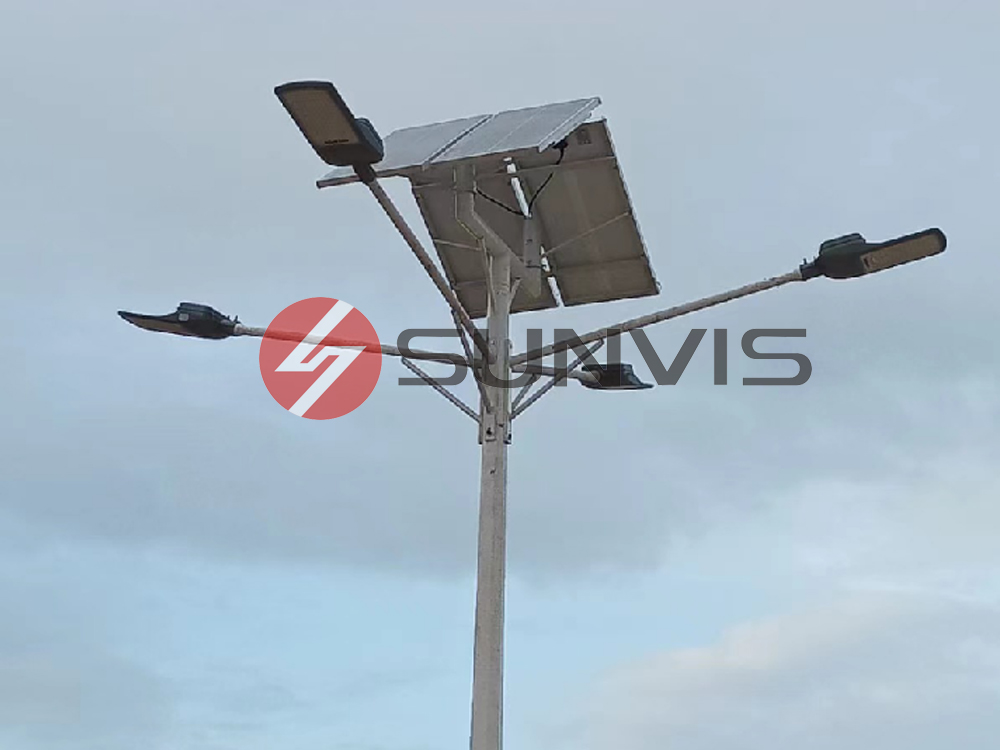
Step 6: Assembly of Components (Solar Panels, Lamp Arms, Lamp Heads, and Lamp Posts)
Installation of solar panels:
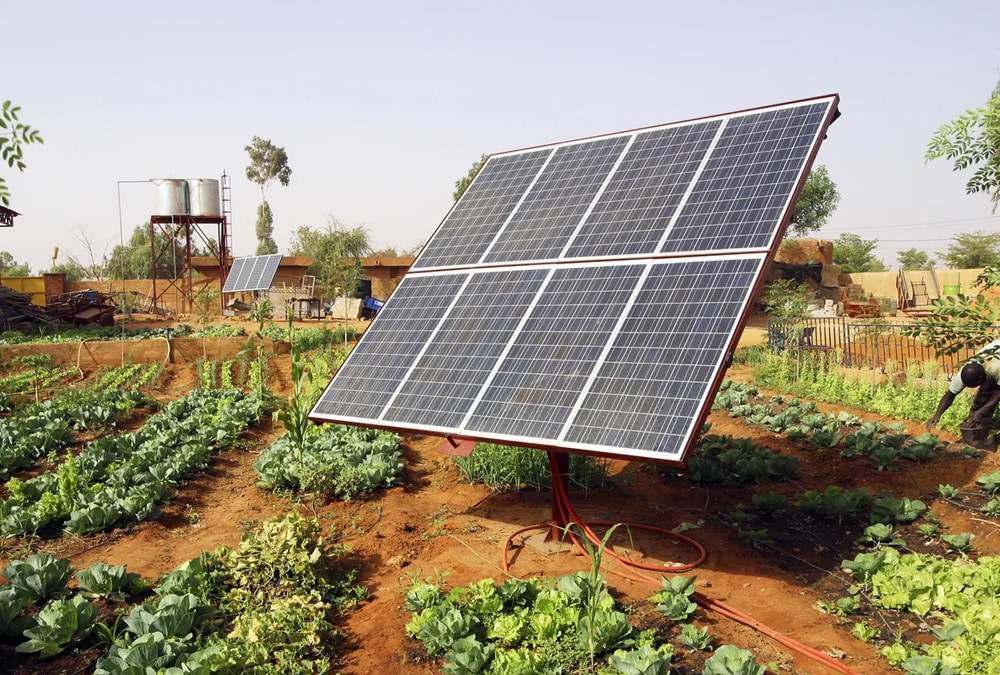
Use rustproof screws to fix the solar panel to the lamp post, and pay attention to the orientation of the solar panel towards the sun.
If you are not sure what is a rust-proof screw, you can directly consult a professional fastener manufacturer.
Installation of lamp arms:
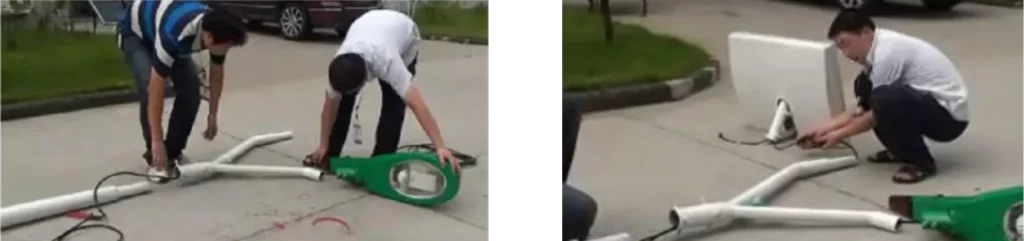
Secure the lamp arm to the lamp post and tighten the screws.
Lamp head installation:
Secure the lamp head to the lamp arm, facing the road surface and not crooked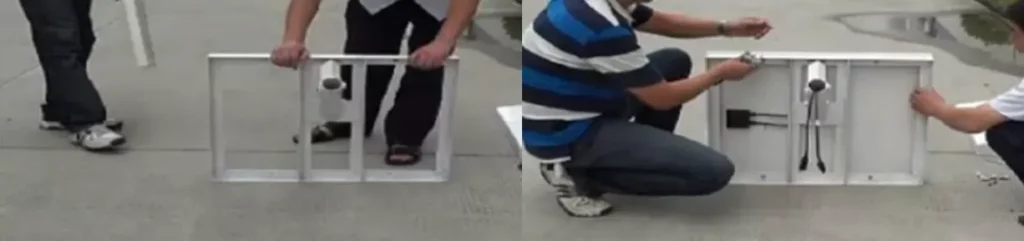
Step 7: Test The Circuit Before Installing The Light pole
Follow the steps to avoid mistakes:
First, connect the lamp head wires and the controller.
Connect the battery and the controller: If the light is on, it means that the wiring is correct and both the lamp head and battery are of good quality.
Then Connect the solar panel and the controller: If the light goes out, it means that there are no problems with the components and wiring. At this point, disconnect the controller from all components and prepare to erect the lamp post.
Step 8: Lifting the Lamp Post
Lamp posts under 6 meters, can be erected manually as long as safety is ensured.
For lamp posts over 6 meters, a crane must be used to ensure safety.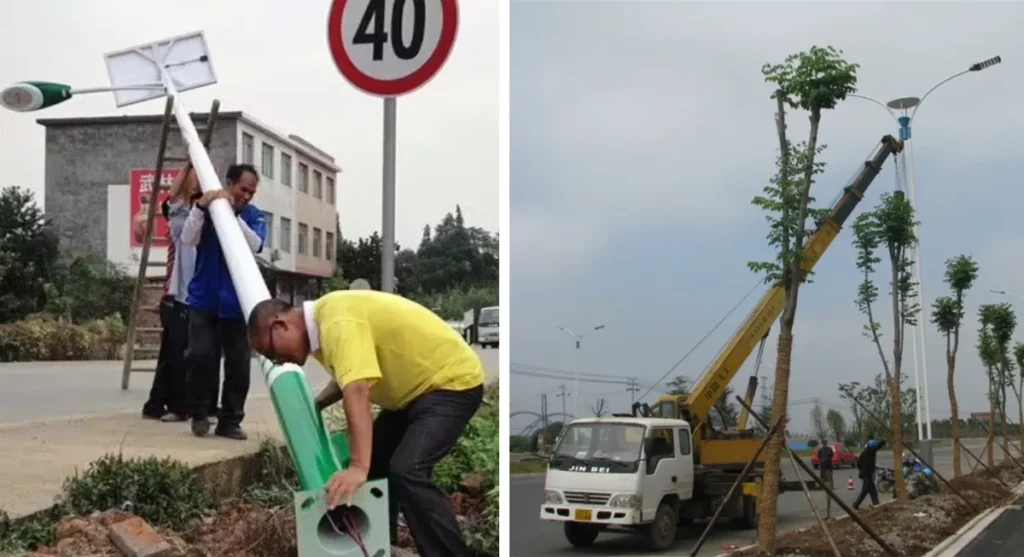
Step 9: Wiring and Setting
Wiring sequence:
Connect the lamp head to the controller.
Connect the battery to the controller.
Connect the solar panel to the controller.
If the lamp head lights up when connected to the battery, and goes out when the solar panel is connected, it means that the wiring is correct and all components are functioning properly.
Setting
Adjust the lighting time and mode according to the lighting requirements and the controller manual. Secure the controller and close the maintenance door, then bury the battery box.
Safety Guidelines
When installing a solar street light system, certain safety guidelines must be followed to prevent accidents and injuries. Some safety guidelines you should follow include:
Wear protective equipment such as gloves and safety goggles to prevent injury from sharp objects or electric shock.
Ensure that the installation site has no potential hazards such as water, mud, or loose soil.
Use appropriate lifting equipment to lift the pole.
Conclusion
In conclusion, the installation of solar street lights requires careful planning, preparation, and execution. From determining the appropriate location to assembling the various components, each step of the process should be followed meticulously to ensure a safe, reliable, and long-lasting system.
With proper installation and maintenance, these lights can provide reliable illumination for years to come


